On this page
Flash the card
The Aircast Flasher downloads Aircast OS for your board, writes your Wi-Fi, a name and remote access onto the card, then writes it and reads it back. About five minutes after the download, and no terminal.
Download the Flasher
Aircast Flasher
Version v0.3.6 • Stable version
Writing an SD card needs admin/root access, so the installer will ask for permission.
It runs on your computer, not a phone, because it writes the SD card. You need a card reader and a microSD card of 16 GB or more.
Opening it the first time
The first time you open the Flasher on a Mac, you'll probably see this:
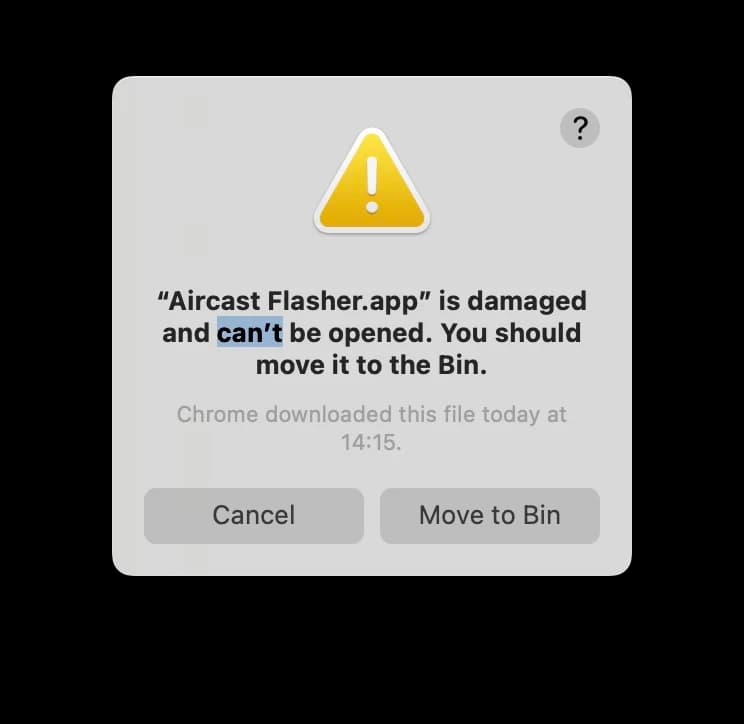
Why it happens: macOS quarantines anything downloaded from the internet and won't open an app unless it's been notarized by Apple, a paid step where Apple scans and approves the developer's build. The Aircast Flasher is a free, open pre-release that isn't notarized yet, so macOS shows the generic is damaged message instead of letting it run. Apple Silicon Macs are especially strict about this.
The fix: after dragging the app into Applications, clear the quarantine flag once in Terminal, then open the app normally:
xattr -dr com.apple.quarantine "/Applications/Aircast Flasher.app"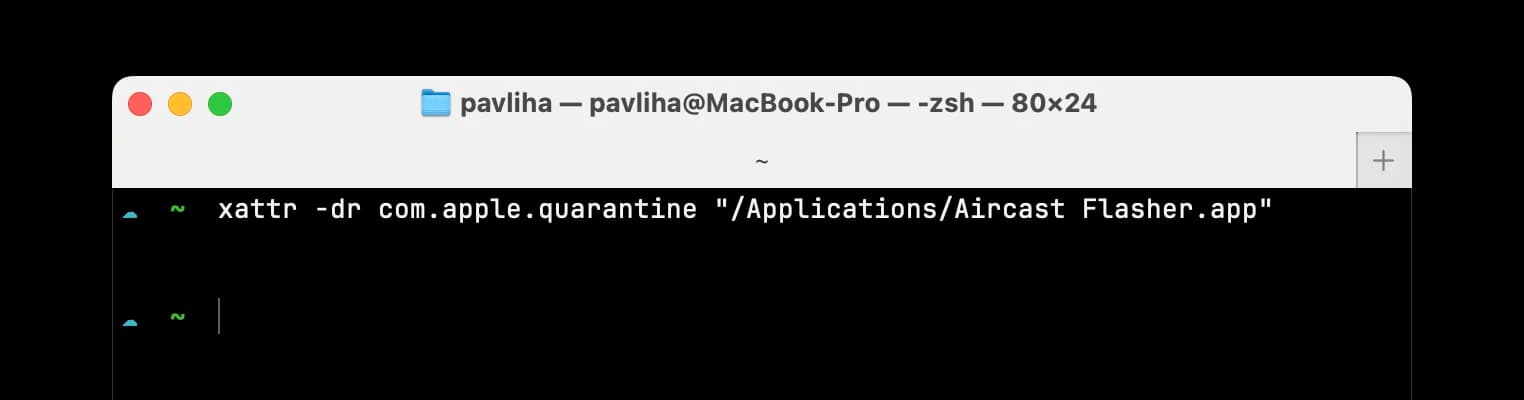
It runs silently, so no output means it worked. Now open Aircast Flasher from Applications.
Right-clicking the app and choosing Open (or Open Anyway under Privacy & Security) usually won't clear the damaged state on Apple Silicon. The command above is the reliable path.
On Windows you'll likely see a blue Windows protected your PC screen the first time you run the installer:
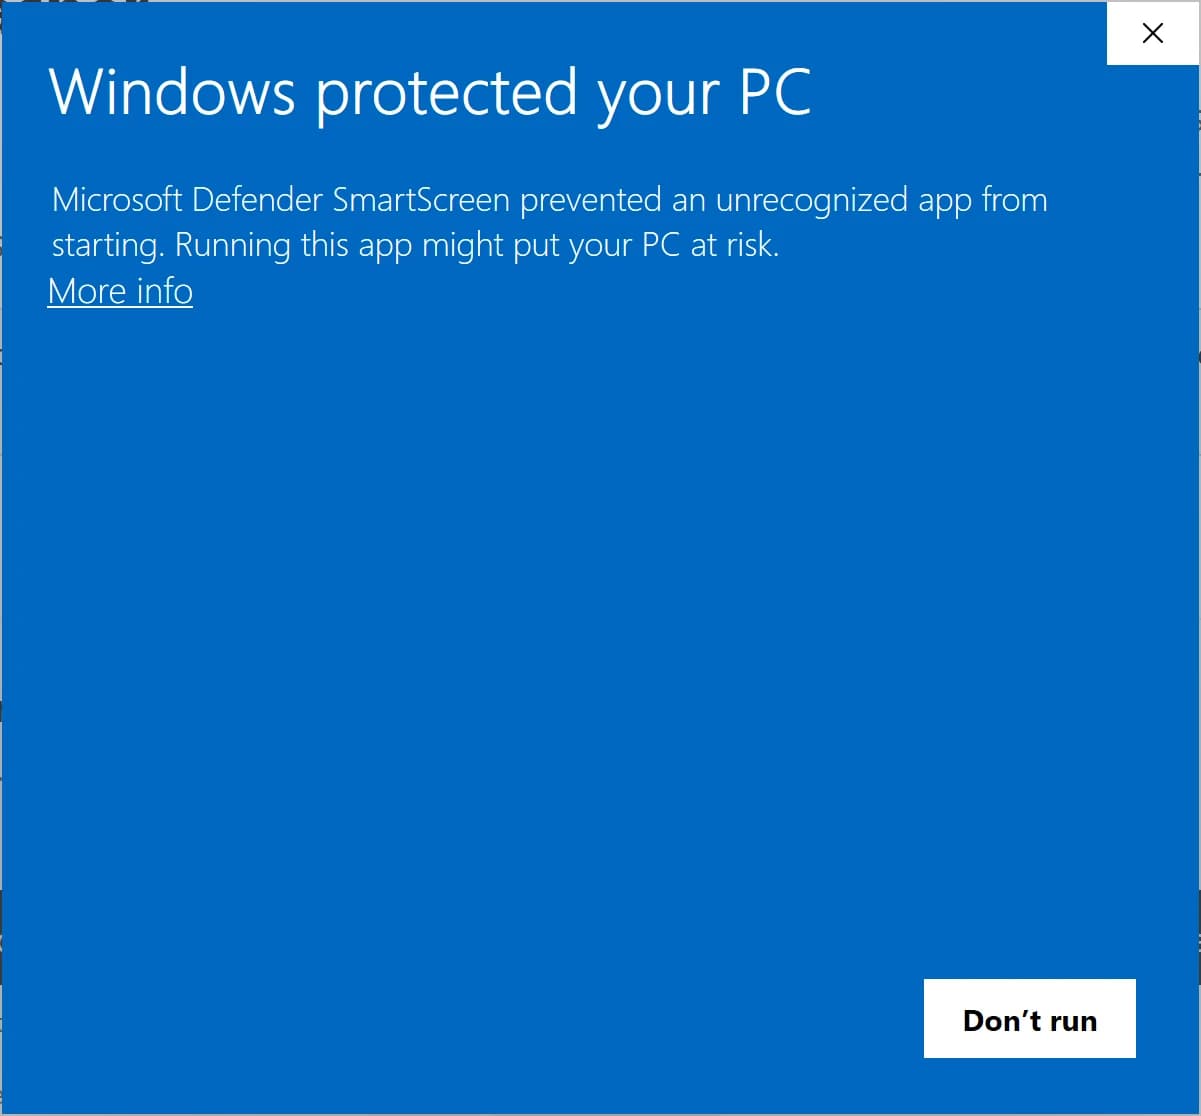
Why it happens: SmartScreen warns about any app it hasn't seen from a known publisher. Earning that reputation requires a paid code-signing certificate and enough downloads for Microsoft to build trust. The Aircast Flasher is a free, open pre-release that isn't code-signed yet, so it shows up as an unrecognized app from an unknown publisher.
The fix: click More info, confirm the app is Aircast.Flasher, then click Run anyway:
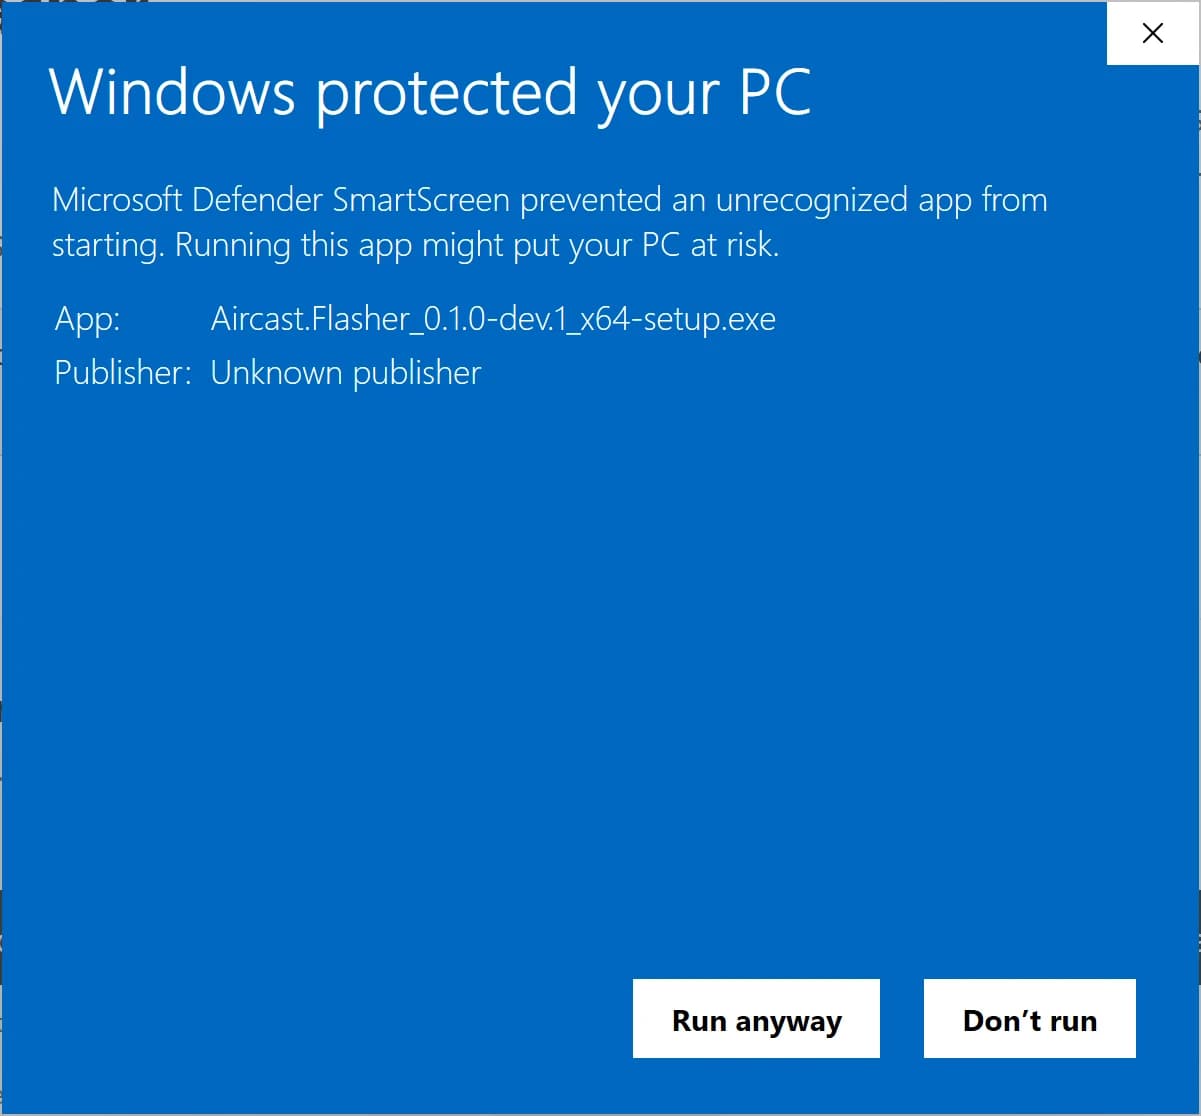
The installer then runs as normal.
Linux doesn't gate unsigned apps, so there are no warnings to click through. Make the AppImage executable and run it:
chmod +x Aircast.Flasher*.AppImage && ./Aircast.Flasher*.AppImageThe .deb installs with your package manager as usual.
The five screens
The Flasher walks Operating system, Network, Access, Storage and Write. The first time it opens it also asks whether to share anonymous diagnostics.
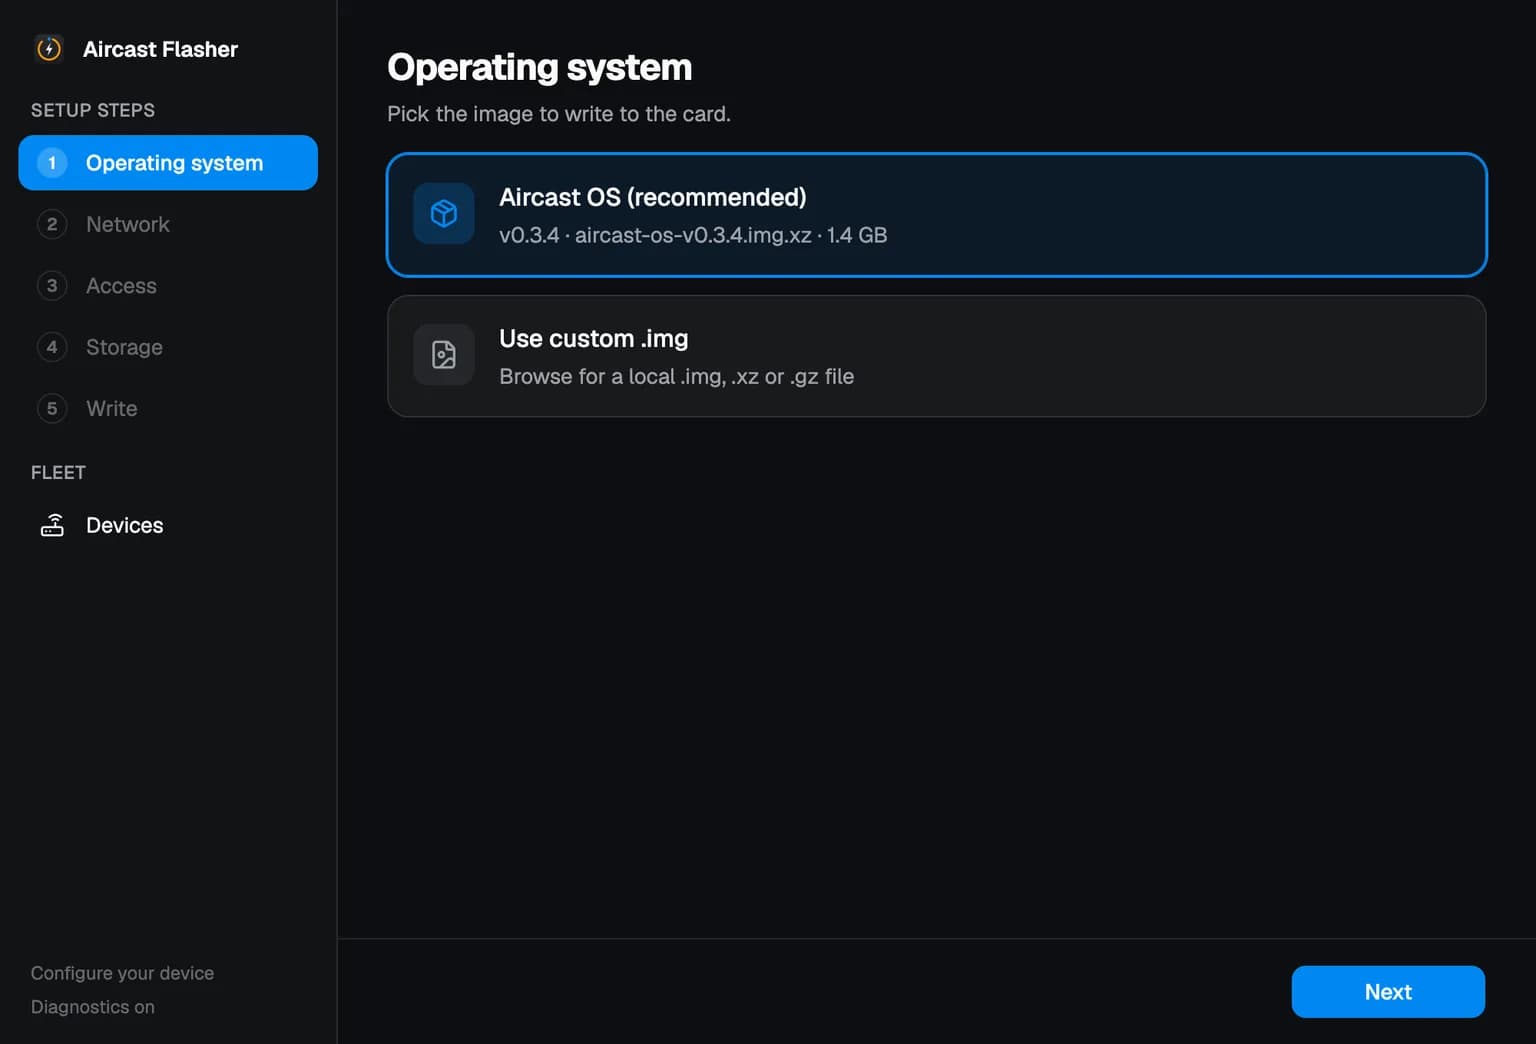
Operating system
Under Which board is this card for? pick the maker, then the model; Raspberry Pi needs no second step. Aircast OS for Raspberry Pi (recommended) is then selected with its version, and the Flasher downloads it for you, so there is no image to fetch or unpack by hand. Boards marked Beta are the Orange Pi, Radxa and Banana Pi images from Which board.
Network
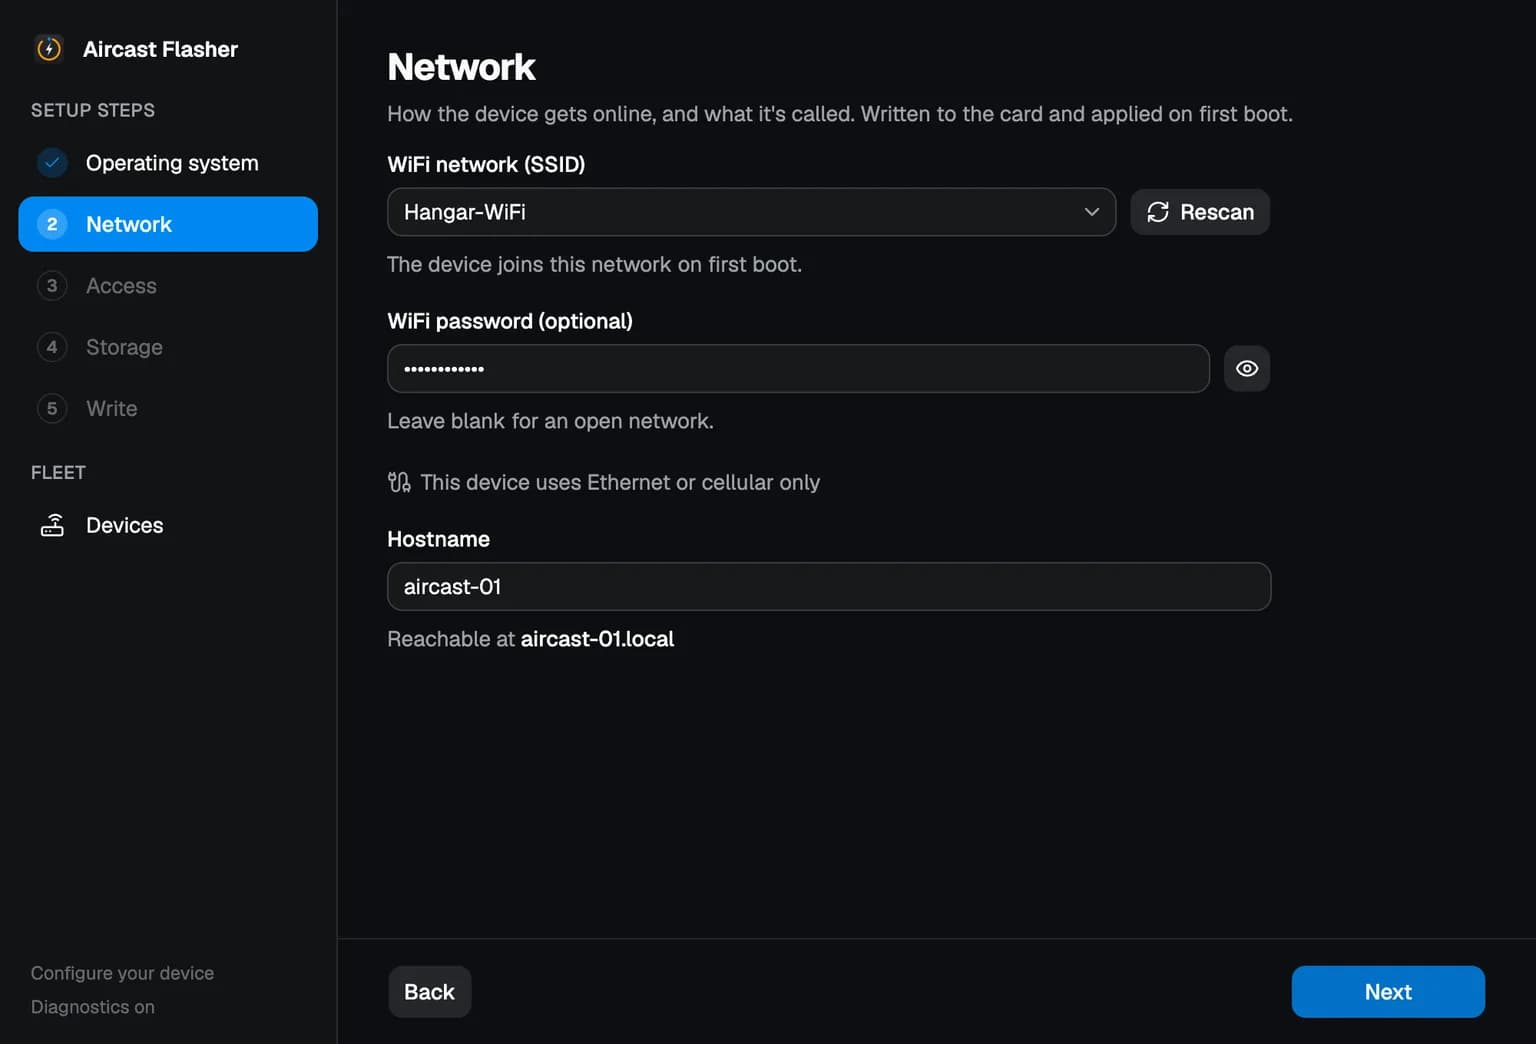
Pick your Wi-Fi network and enter its password, so the drone joins it the first time it boots. Then give it a hostname, such as falcon-01: that is how you find it on your network, as falcon-01.local, so pick names you will tell apart across a fleet. A drone with no Wi-Fi in range can use This device uses Ethernet or cellular only. Replacing a card? Restore settings from a backup at the top brings back the old card's settings.
Access
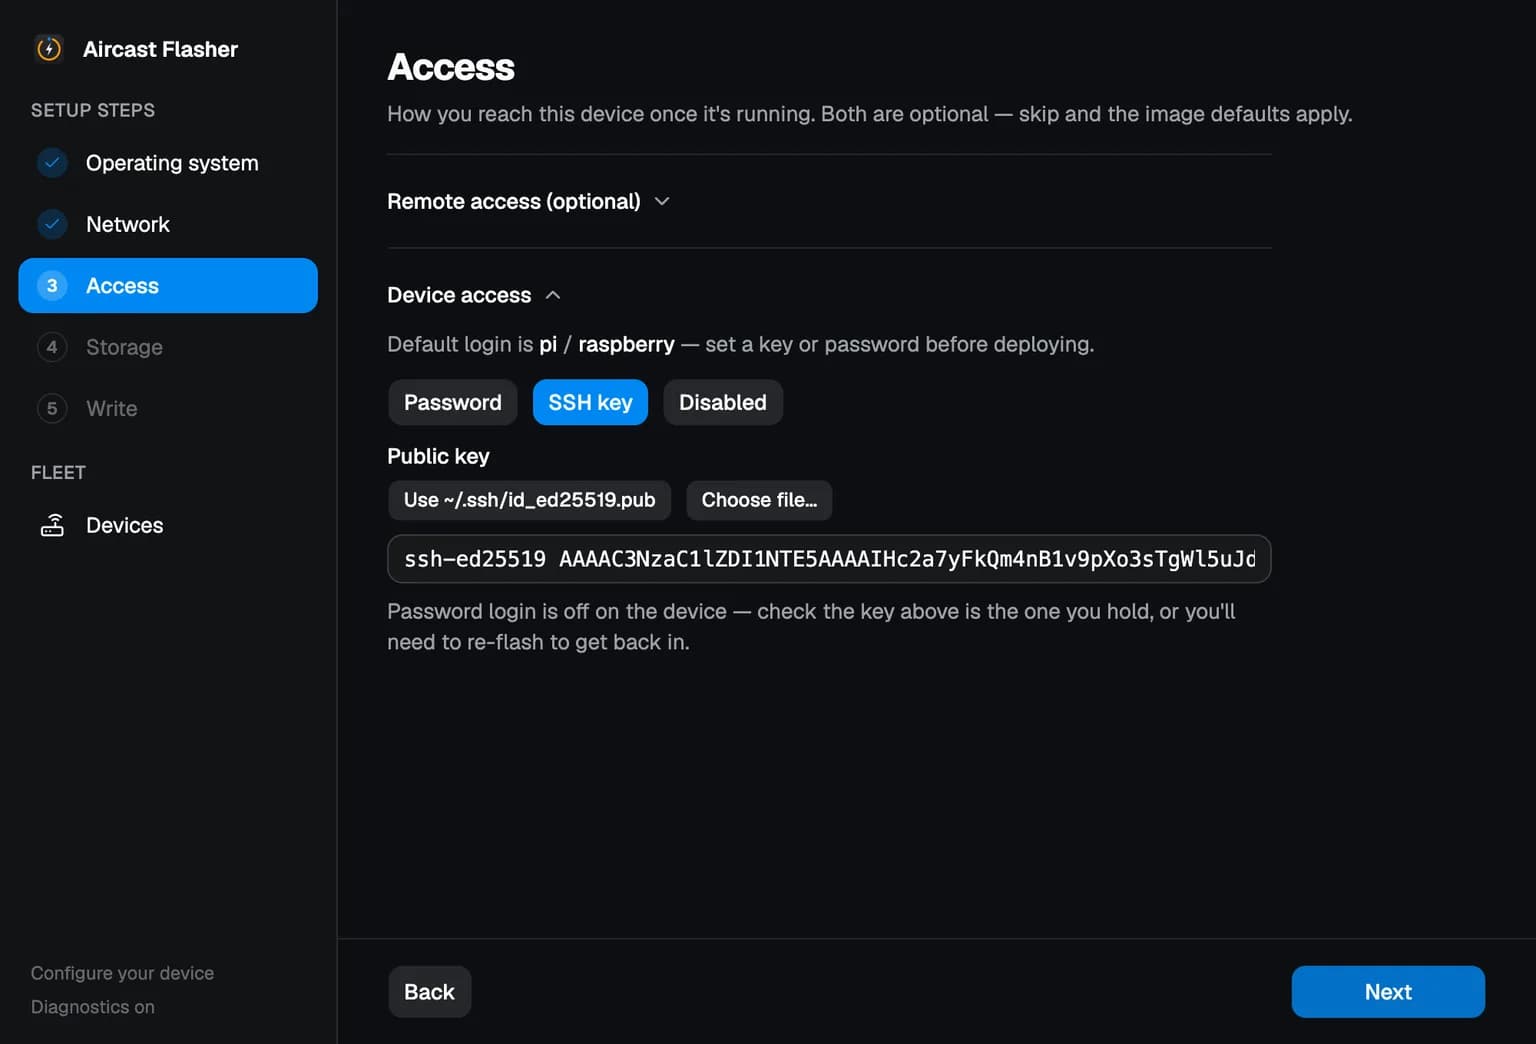
How you get into the drone once it runs. Everything here is optional.
- Remote access puts the drone on your Tailscale or Headscale network by itself on first boot, so you can reach it from anywhere. Paste an API token and the Flasher makes a one-time key for each card, or paste a pre-auth key yourself. Skip it and you can sign the drone in later, during setup. See Tailscale.
- Disk encryption and Fight mode lock the drone's data to a key server and keep no logs on it. Both need Aircast OS v0.3.6 or newer, which today means a beta image. See Disk encryption.
- SSH login, under Advanced, replaces the default
pi / raspberrylogin. An SSH key is the safest choice, and the Flasher offers the one already on your computer. With a key set, password login is off, so check it is a key you hold.
Storage
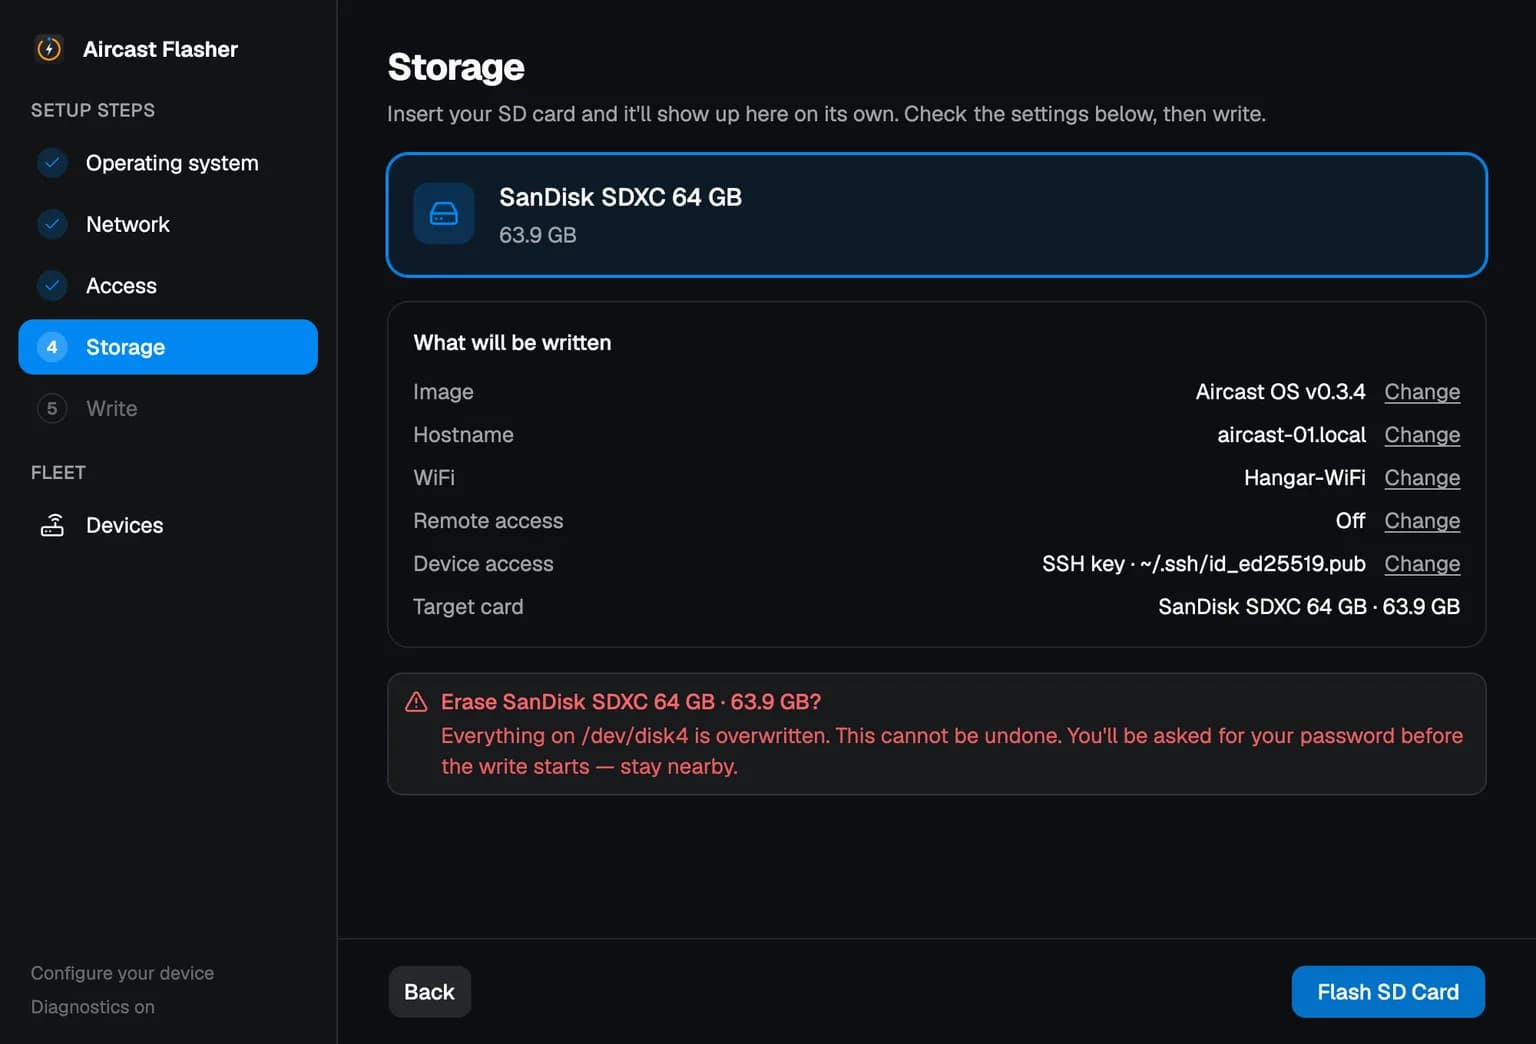
Insert the microSD card and it appears by itself. This screen also sums up everything about to be written, so read it: the card is erased, and this is the one step you cannot undo.
Write
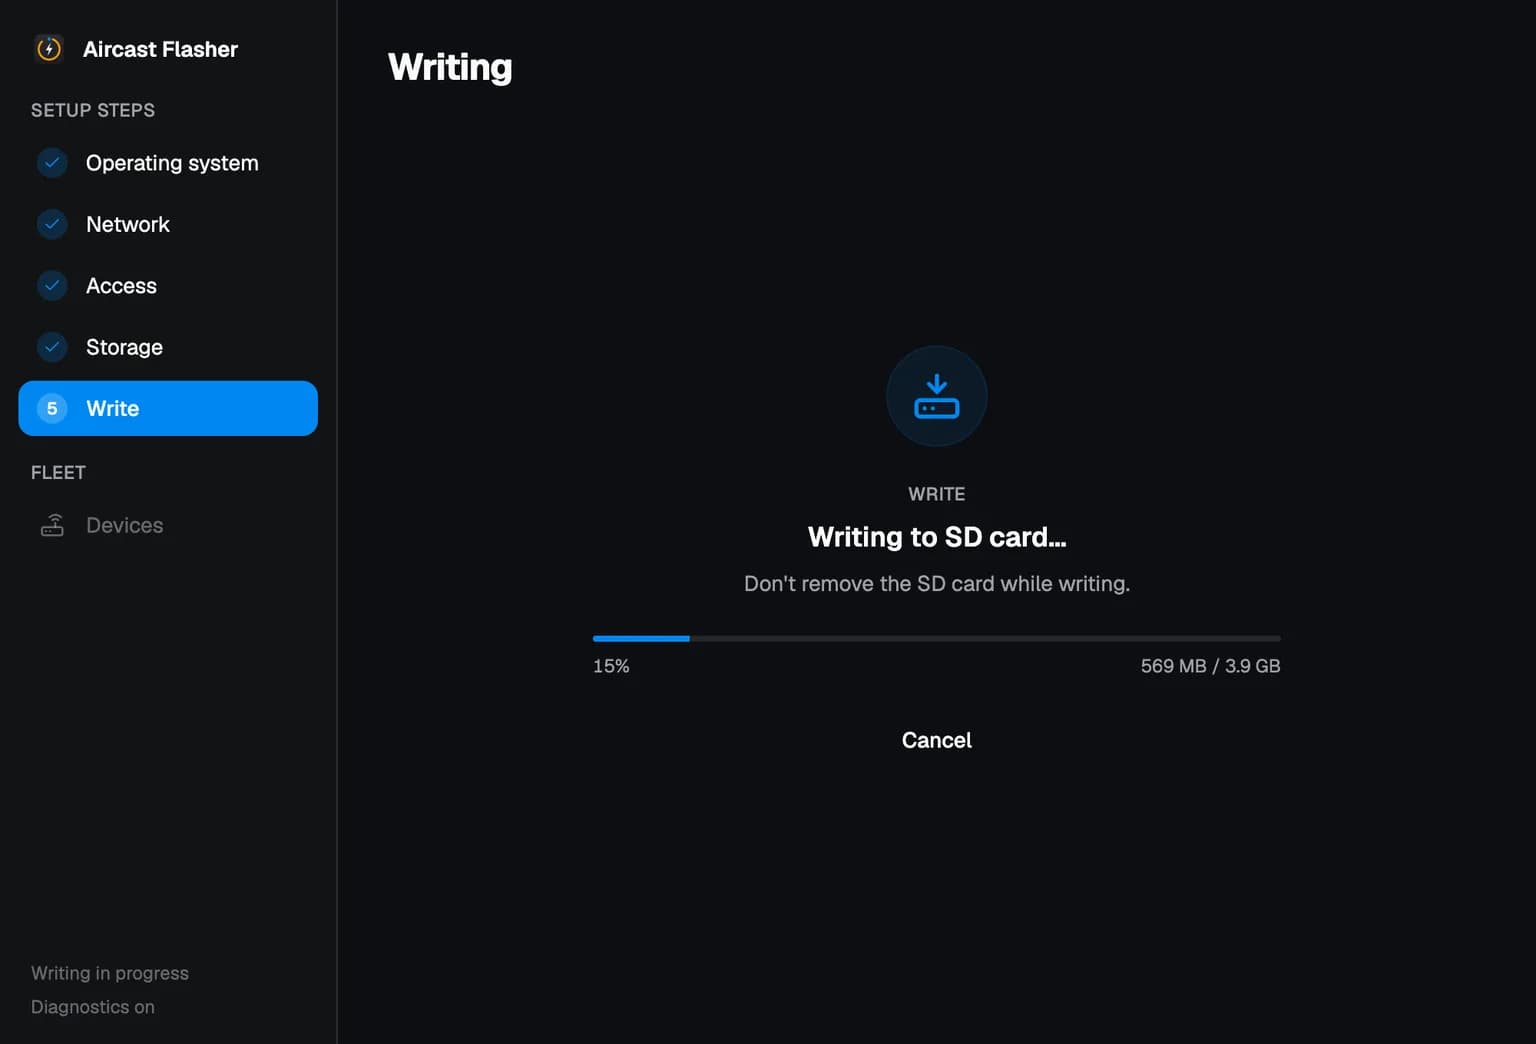
Hit Flash SD Card. The Flasher downloads, writes, applies your settings and then reads the card back. Let the check finish: a badly written card looks exactly like a drone that will not boot, and the check is what tells them apart.
Card ready: keep the Flasher open
Eject the card, put it in the drone and power it on with the SIM in the modem. The Flasher then looks for the drone on your network and, if you set remote access, on your tailnet. The first start takes a few minutes and restarts once, so don't unplug it.
When it shows online, press Continue setup. That opens the drone in your browser, where the last step happens.
raspberry. See Device Unreachable.Advanced: the command line, or writing the card yourself
The Flasher's command-line tool takes the board as --board <id> on releases, download and flash, and defaults to rpi. aircast-flasher-cli boards lists every id; the MCP tools take board.
aircast-flasher-cli flash --disk /dev/disk4 --board rock-5b --hostname falcon-01You can also write the image with Raspberry Pi Imager or dd. You lose the Wi-Fi, hostname and remote access the Flasher writes, so the drone joins over Ethernet or raises its hotspot on first boot. The Flasher and the image are versioned separately, so their numbers are not meant to match.
Aircast OS image
Pick the image for your board.
Raspberry Pi
v0.3.5Want the newest features? Try the v0.4.0-beta.4 pre-release
Compatible with: Pi 3, 4, 5 and Zero 2 W (64-bit ARM)
Other boards
Beta: built and image-checked; the Radxa ZERO 3W has also been tested on real hardware. Supported Boards lists WiFi and the --board value for each.
Orange Pi
- Orange Pi 5BetaRK3588S
- Orange Pi 5 PlusBetaRK3588
- Orange Pi 5 ProBetaRK3588S
- Orange Pi 5 MaxBetaRK3588
- Orange Pi 5 UltraBetaRK3588
- Orange Pi 3BBetaRK3566
Radxa
- Radxa ROCK 5ABetaRK3588S
- Radxa ROCK 5BBetaRK3588
- Radxa ROCK 5B+BetaRK3588
- Radxa ROCK 5CBetaRK3588S
- Radxa ROCK 5TBetaRK3588
- Radxa ROCK 5 ITXBetaRK3588
- Radxa ROCK 3ABetaRK3568
- Radxa ROCK 3CBetaRK3566
- Radxa ZERO 3W / 3EBetaRK3566
- Radxa E52CBetaRK3582
- Radxa E25BetaRK3568
Banana Pi
- Banana Pi BPI-M7BetaRK3588
- Banana Pi BPI-R2 ProBetaRK3568
- Banana Pi BPI-M5BetaS905X3
- Banana Pi BPI-M2 ProBetaS905X3
- Banana Pi BPI-M2SBetaA311D
- Banana Pi BPI-CM4 + IO boardBetaA311D
- Banana Pi BPI-M4 ZeroBetaH618
- Banana Pi BPI-M4 BerryBetaH618
- Banana Pi BPI-M64BetaA64
Next, step 3 of 3
First flight
Power on, finish setup in the Device tab of the app the drone serves, then fly with live video and telemetry.
On This Page